Home >> Android Recovery Tutorials >>

Recover Sony Xperia Audios

How to Restore Deleted Audio Files from Sony Xperia

Losing some audios from Sony Xperia is not a pleasant experience at all. But data loss may possibly happen on some of the mobile users in Various Circumstances. If the audios are important for you, you have to find the effective way to recover them as soon as possible.

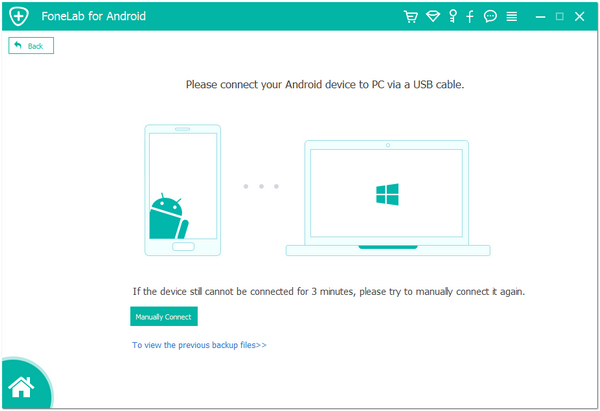
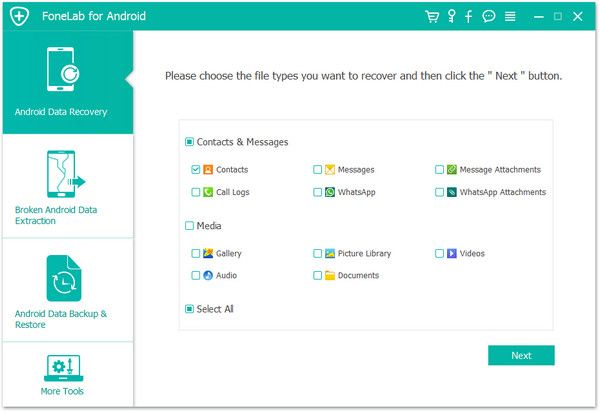
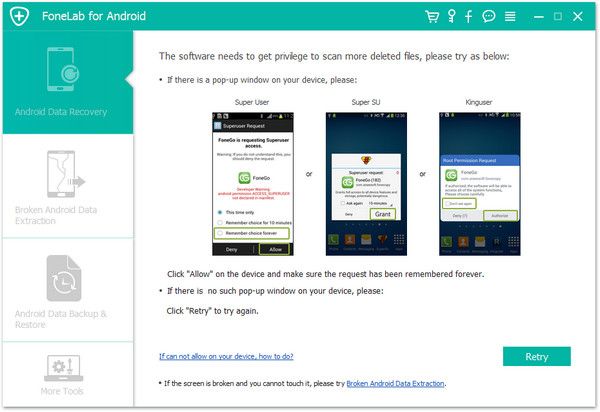
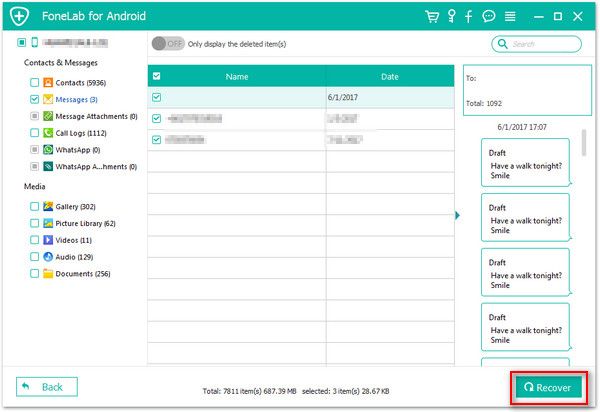
Android Data Recovery application is powerful enough for you to recover different types of data in just a few steps, including audios, photos, videos, contacts, and more. To restore deleted audios from Sony Xperia 10/5/1/XZ3/XZ2/XZ1/XZ and other models, you need to launch Android Data Recovery on the computer and connect your Sony Xperia to it, then the program will enter and scan out the deleted data for you. With the user-friendly interface, you can easily operate as you follow the steps.

You are able to use this Android data recovery program to recover data from almost all brands of Android phones and tablets, including Sony, Samsung, HTC, Motorola, ZTE, Xiaomi, Huawei, etc.

More Features About Android Data Recovery Software:

1. Undelete data due to mistaken deletion, factory reset, system crash, forgotten password, flashing ROM, rooting, ect from android phone or SD card.

2. Preview data before recovery and selectively recover deleted data you need from android phone.

3. Fix android phone system problem like frozen, crashed, black-screen, virus-attack, screen-locked, get the phone back to normal.

4. Extract data from broken Samsung phone internal storage and SD card.

5. One-click to backup and restore Android phone data.

Now, let’s try the free trial version on the computer to check the detailed steps to recover lost audios from Sony Xperia.

Download Win Version Download Mac Version

Steps to Get Back Deleted Audios/Music from Sony Xperia

Step 1. Run the program and connect device to PC

Download, install and run the Android Data Recovery tool on the computer, switch to "Android Data Recovery" option in the main window, and then connect your Sony Xperia phone to your same computer via a USB cable, you will see the below interface.

connect sony xperia to pc

Step 2. Enable USB Debugging

If you turn on USB debugging before, the program will detect your phone immediately, else it will requires you to open it. The software will show you three options, please choose the one for your phone’s Android OS.

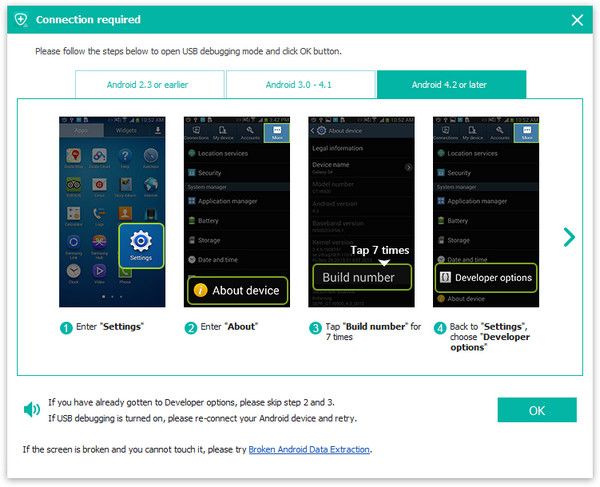
1. For Android 2.3 or earlier: Tap "Settings" > "Application" > "Development" > check "USB debugging".
2. For Android 3.0 to 4.1: Tap "Settings" > "Developer options" > check "USB debugging".
3. For Android 4.2 and latter: Tap "Settings", tab "Build number" for 7 times. Then back to "Settings" and choose "Developer options" > "USB debugging".

enable usb debugging

Step 3. Select data type and analyze your phone

In this step, you should choose data type you want to scan, you can see photos, videos, contacts, text messages, audios, whatsapp, document, now we tick "Audios" and untick other data type, then click "Next" to go on.

select file type

Now the software will start analyze your phone and it will root your phone, if the software fail to root the phone, you need to root it by yourself. After that, you can click "Allow/Grant/Authorize" on your Sony Xperia phone's screen and the software will get the privilege to scan deleted files for portable device.

get privilege on sony xperia

Step 4. View and restore audio

Now the software will start scan your phone in deep, you will see the scan progress bar. After the scan, a list of recoverable files that have been found from your Sony Xperia will be shown. You will see a preview window of audios, check each one in detail and mark the audio files you want and click "Recover" button, choose destination folder to save them on your computer.

recover audios from sony xperia

Download Win Version Download Mac Version


comments powered by Disqus

Recover Sony Xperia Audios

Copyright © android-recovery-transfer.com 2023. All rights reserved.