The third party instant messaging apps on iPhone, such as WeChat, WhatsApp, etc, are supports people to send messages to other. It is convenient for you to speak out what you would like to convey by audio message instead of texting a message.
Your important audio messages may removed accidentally due to different factors. If you have no ideal how to recover them back, you will find the answer here. When you encounter important data lost on your iPhone, especially without a backup file, it is really annoying. Fortunately, iPhone Data Recovery can help you solve the problem of accidental data loss on iPhone, which supports all kinds of models of iOS mobile devices including iPhone, iPad or iPod.
When you delete audio messages on iPhone, the deleted messages are actually still saved on your device, until they are overwritten by any new data. Before that however you still have the chance to scan and recover them with the help of iPhone Data Recovery. It is a 100% reliable app that allows you to restore your lost audio messages, photos, contacts, documents and more with or without backup.
Key Features about iPhone Data Recovery:
- No matter you have backup or not, it can scan and recover lost data without replacing any data with ease. There are 3 recovery modes for options: recover from iOS device, recover from iTunes backup, and recover from iCloud.
- Supports backup and restore your data on iPhone, iPad or iPod touch within a few clicks.
- iOS System Recovery for fixing your iOS system error of iPhone/iPad/iPod.
Check out this step-by-step guide to recover deleted audio messages from iPhone.
Directly Undelete Audio Messages from iPhone Directly
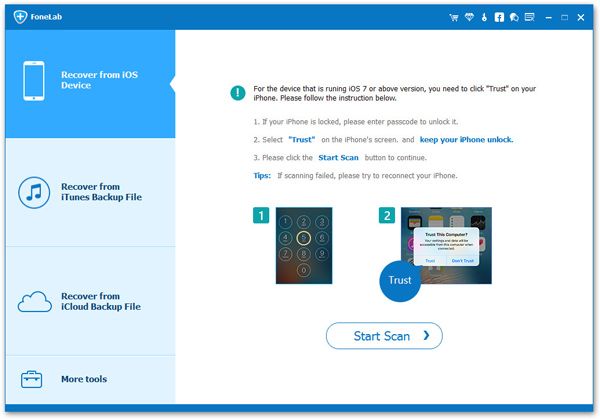
Step 1. Run the iPhone data recovery progran on computer and go to "iPhone Data Recovery" option in the main screen, then you will see a new windows, the software will switch to default recovery mode: Recover from iOS Device. Link your iPhone to the software, it will be detected by the software and you can see some information for iPhone, then you can tap "Start Scan" button to scan internal memory.
Notes: Before we using the iPhone data recovery software, you need to install iTunes on computer first, then the feature will work for you.
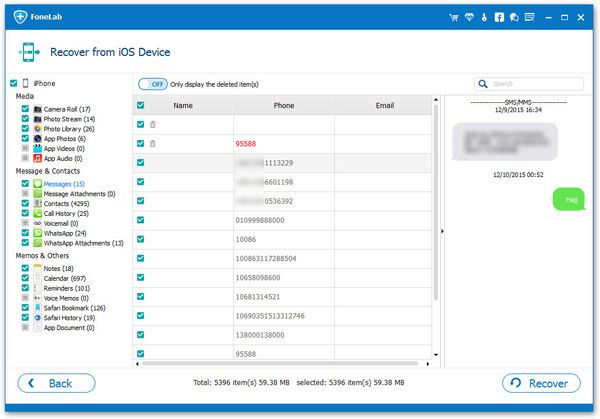
Step 2. Wait for the software finish the scan process, then you will see all data on your iPhone list in category on the left sidebar, tap the data type like whatsapp, wechat, qq, viber, link, kik and others, then view related recoverable audio messages on the right part of scan result, you are allowed to check erased data by click the option "Only display the deleted item", select the ones you want and tap "Restore to Device" or "Restore to PC" to get audio messages back.
Extract iTunes Backup Files for iPhone Audio Messages
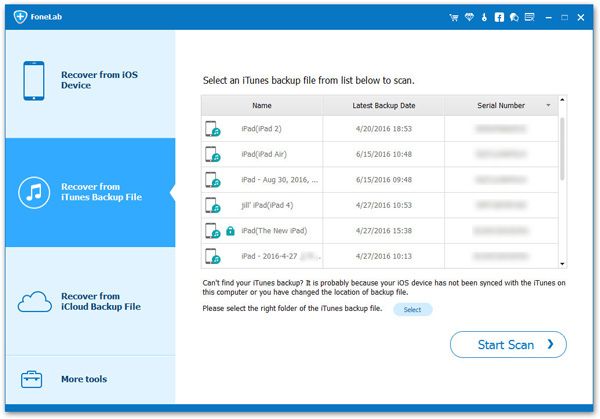
Step 1. Tap on "iPhone Data Recovery" > "Recover from iTunes backup" in the main interface when you run iPhone data recovery on computer. All backups on iTunes will be listed in order as the below windows, choose one backup contain deleted audio files and click "Start Scan" button to extract it. If you can't find iTunes backup in the interface, it probably means that the audio messages did not been backed up on the computer.
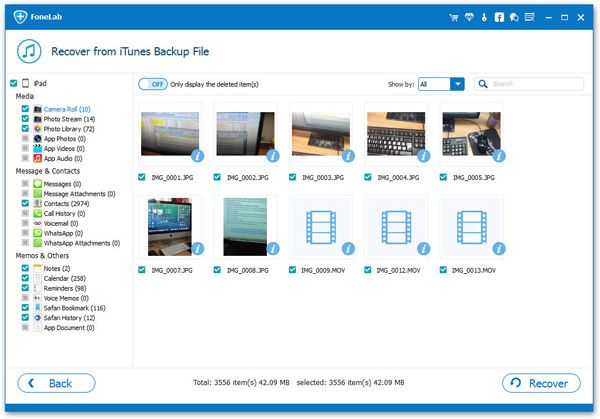
Step 2. After scanning, all recoverable data type will be listed on the left panel, tap data type whatsapp, wechat, viber, messages, viber or others and preview deleted data on the right side of scan result, choose audio messages you need and tap "Restore to PC" button, choose a target folder to save all selected audio messages to computer for use. If you need to restore audio messages to iPhone, tap "Restore to Device" option.
Extract iCloud Backup Files for iPhone Audio Messages
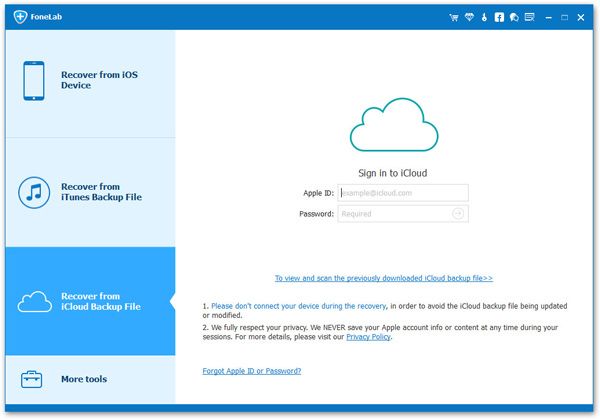
Step 1. Run iPhone data recovery on computer and choose the mode "Recover from iCloud backup", then using your Apple ID and password to login iCloud account.
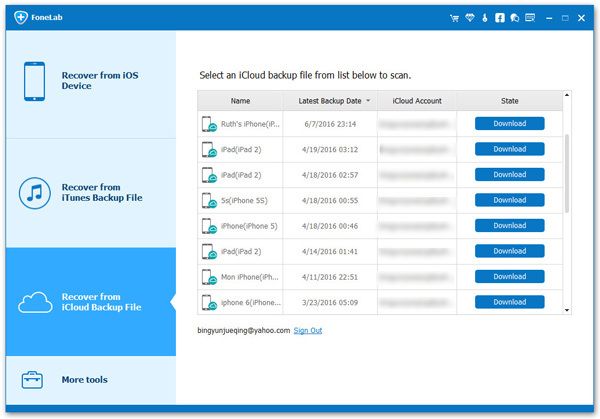
Step 2. After logging successfully, your backup files on iCloud will be scanned and listed in order on the interface, you can click one backup you want and click "Download" on the right bottom to get it to computer, then click same button to start extract it. If you download a wrong backup, you can click "Cancel" button to stop downloading during the process.
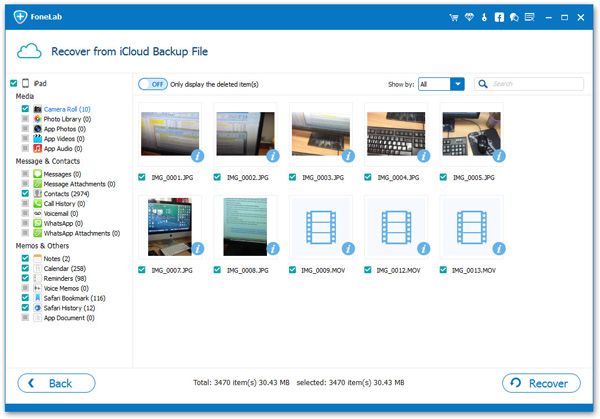
Step 3. Now the software will start scan your backup automatically, when the extract is over, you will see all detail information for backup files, tap one data type on the left menu and preview recoverable audio messages on the right side of scan result, then select audio messages you want to restore and click "Restore to Device" or "Restore to PC" button restore data back.