The Notes app on an iPhone is an extremely useful one as it allows you to note down thoughts, tasks, grocery lists, etc. that you want to check at a later time. When you use and manage your iPhone, you may delete some of the important files accidentally, which has caused a lot of trouble for some users. In the following guide, you are going to learn to restore notes from iCloud.
Part 1. How to Recover Notes from iCloud with iPhone Data Recovery
iPhone Data Recovery works perfectly in various types of data recovery from iOS device directly iCloud backup or iTunes backup. It support you recover deleted notes, photos, videos, messages, call logs and more.
Main Features about iPhone Data Recovery:
- Best iOS data recovering and backing up tool to recover and backup iOS data to PC or Mac.
- Three recovery mode to recover iPhone data: Recover from iOS device, recover from iTunes backup, recover from iCloud backup.
- Recover files over 22+ types for iPhone iPad iPod.
- Fix iOS system and get it back to normal.
- Transfer WhatsApp messages between two iOS devices, back up or restore WhatsApp messages in one-click.
Download the trial version of iPhone Data Recovery on your computer. Then see the details in the following guide.
Step 1. Launch iPhone Data Recovery on Computer
After the download completed, install and launch iPhone Data Recovery on your computer.
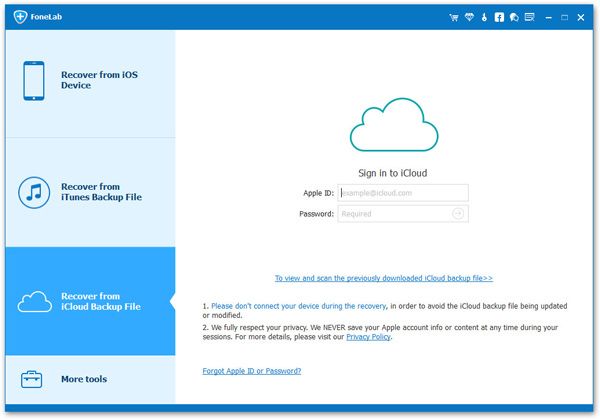
Step 2. Select the Mode and Sign in to iCloud
After entering the home page of the software, select "Recover from iCloud" mode to enter the iCloud login page. Sign in to your iCloud account with your Apple ID and password.
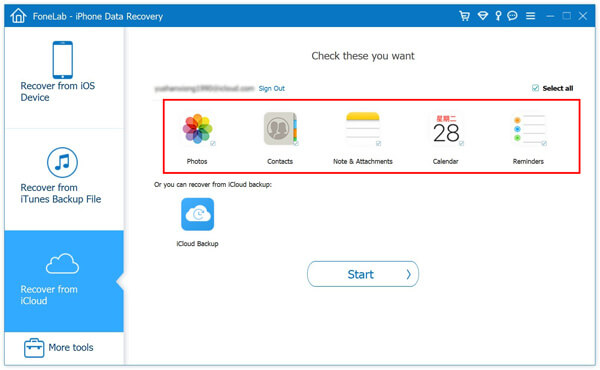
Step 3. Recover from Notes and Attachments
Once in your iCloud account, you can choose the type of data you want to extract. If you are recovering notes that have been synced on iCloud, tick Notes and Attachments and click Start to start scanning.
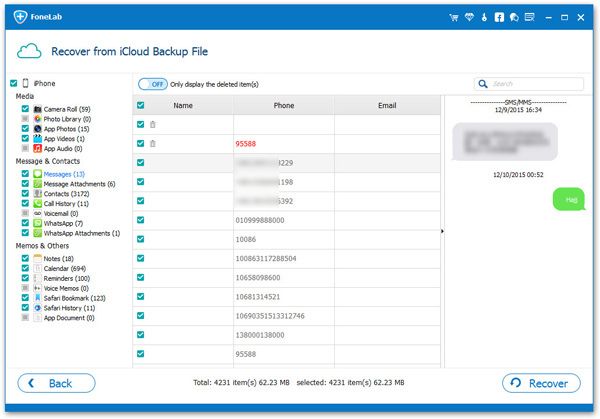
Wait patiently until the scan is over and the found notes will appear on the left side of the screen. You can preview and select the data you want to recover, then click Recover button to save them to your computer.
If your notes are backed up but not synced on iCloud, continue to the next step.
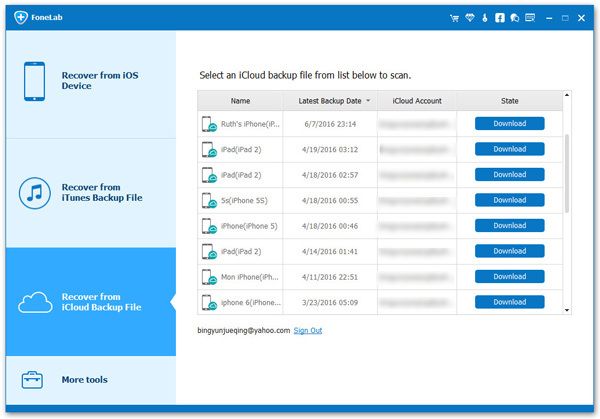
Step 4: Recover from iCloud Backup
Choose the iCloud Backup option and all iCloud backup files will be loaded automatically. Select one iCloud backup file from list to scan you need and click "Download" in the corresponding column.
From the list, you can preview the downloaded file. You can preview and choose the backup what you want, and restore them by clicking the "Recover" button.
Step 5: Move the recovered notes back on the device
The above recovered deleted notes are saved on the computer. If you want to save the recovered notes on your iPhone or iPad, you can put the data back on the device in an optional way: log in to iCloud and move the recovered notes to iCloud Notes to allow them automatically sync with your iDevices. In this way, you will see these notes when you go back to your iPhone/iPad.
Part 2. Recover Lost Notes from iCloud Website
You can create notes in the "iCloud" folder and the "My iPhone" folder to keep track of what you need to save. In the unfortunate event that you lose your iPhone, you can also restore those notes saved in the "iCloud" folder from the iCloud website.
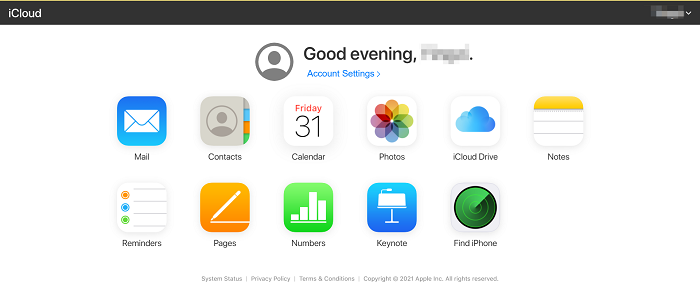
1) Open the iCloud website and log in with your Apple ID.
2) Go to the Notes app and you will see all your notes on iCloud, including those you have deleted in the last 30 days.
3) You can click on annotations and view them. If you want to recover deleted notes from "Recently Deleted", just open the note and hit the "Recover" button to restore them to their original folder.