Android-Recovery-Transfer
Android Recovery, Android Transfer
Mobile phones have become an integral part of our lives and accompany us in our daily lives. With the rapid development of mobile phone photography functions, there are more and more Android mobile phone camera functions. Whether it is a professional photographer or an amateur, you can pick up the Android mobile phone to shoot and record the details of life.
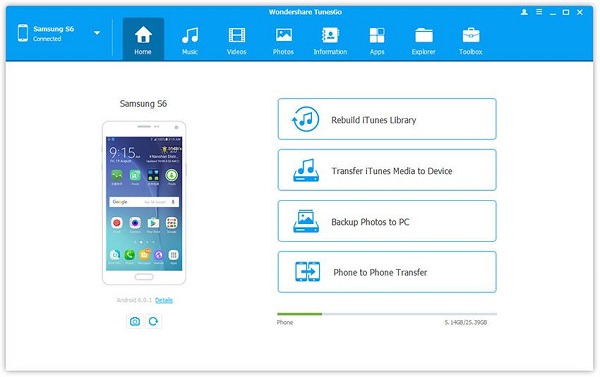
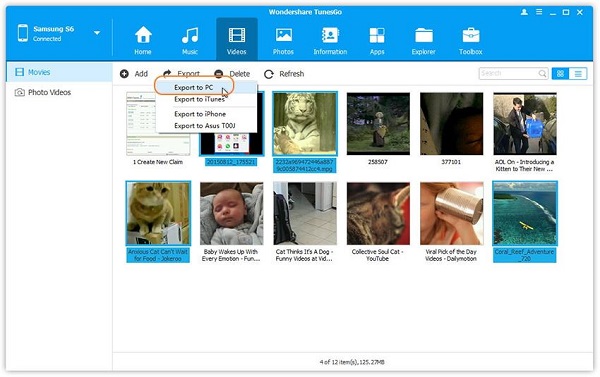
Nowadays, the high-resolution photos of Android phones are developed with a very good degree of detail, which is enough to meet daily needs. For example, some people like to print the photos they have taken into books, or print them into photos for appreciation and use. On the other hand, there are too many functions for taking pictures, which is easy to confuse users. Many people have changed several mobile phones. In the end, the most frequent use is to open the camera and directly press the shutter to take simple pictures. Even with an Android phone at the same moment in the same scene, you can take ever-changing photos by adjusting the parameters. The most important of these is the parameter adjustment of the three elements of exposure, in addition to white balance, focus and so on. At present, all smartphones have simplified the entire shooting process to "press a shutter". If you want to use your mobile phone as a camera to shoot, then parameter adjustment becomes very meaningful. Click on the shooting screen, the place you touch is the exposure reference, that is, the place where the touch point is bright will be darkened, and the place where the touch point is dark will be brightened. You can also lock the exposure with a long press, and adjust the brightness of the screen with the click frame slider.When you take and store a large number of wonderful photos on your Android phone, a safe and convenient way can better help you selectively transfer them to the computer. Here we strongly recommend you to use Android Data Transfer to easily transfer data between Android and computer. Whether you want to transfer all photos to the computer as a backup, or move specific photos to the computer for easy viewing, you can follow the specific steps below to complete.


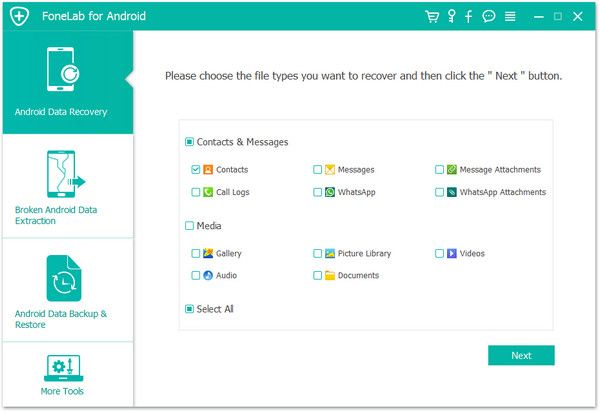
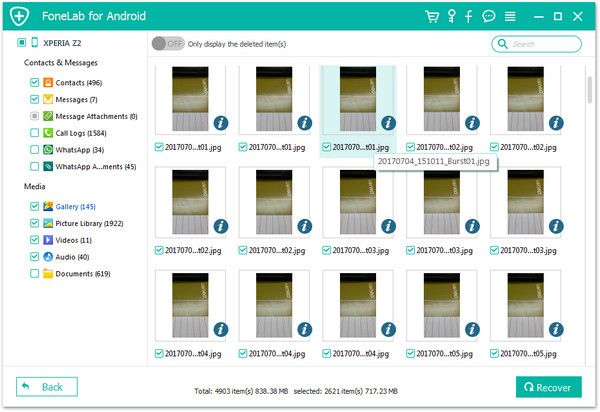
2. Recover lost or deleted Android data without backup, preview and selectively recover android files before recovery.
3. Fix android phone system problem like black-screen, white-screen, screen-locked, get the phone back to normal.4. Suitable for mistaken deletion, factory reset, system crash, forgotten password, flashing ROM, rooting, ect...
5. Support 6000+ Android phone like Samsung Galaxy, LG, Sony Xperia, Google Pixel, Motorola, Huawei, Xiaomi, Vivo, Oppo and more.6. Extract data from broken Samsung phone internal storage and SD card.


Copyright © android-recovery-transfer.com 2023. All rights reserved.


